How do I install the CookieChimp script?
You can install CookieChimp two ways. Direct HTML is the recommended approach — it guarantees CookieChimp loads before Google Tag Manager and any other scripts, so it can set consent defaults before any tag fires.- Direct HTML (Recommended)
- Via Google Tag Manager
Add your website’s CookieChimp JS snippet at the top of the Replace
<head> tag in your HTML, before the Google Tag Manager script and any other scripts.abc123 with your website’s unique CookieChimp ID.The CookieChimp script needs to be the first script in the
<head> section so it can block other scripts before they run and set cookies without consent. If other scripts are added before, they may set cookies and other storage items before consent is granted.How do I block tags with Google Tag Manager?
1
Enable Google Consent Mode
Navigate to “Integrations” from the sidebar and enable the Google Consent Mode integration.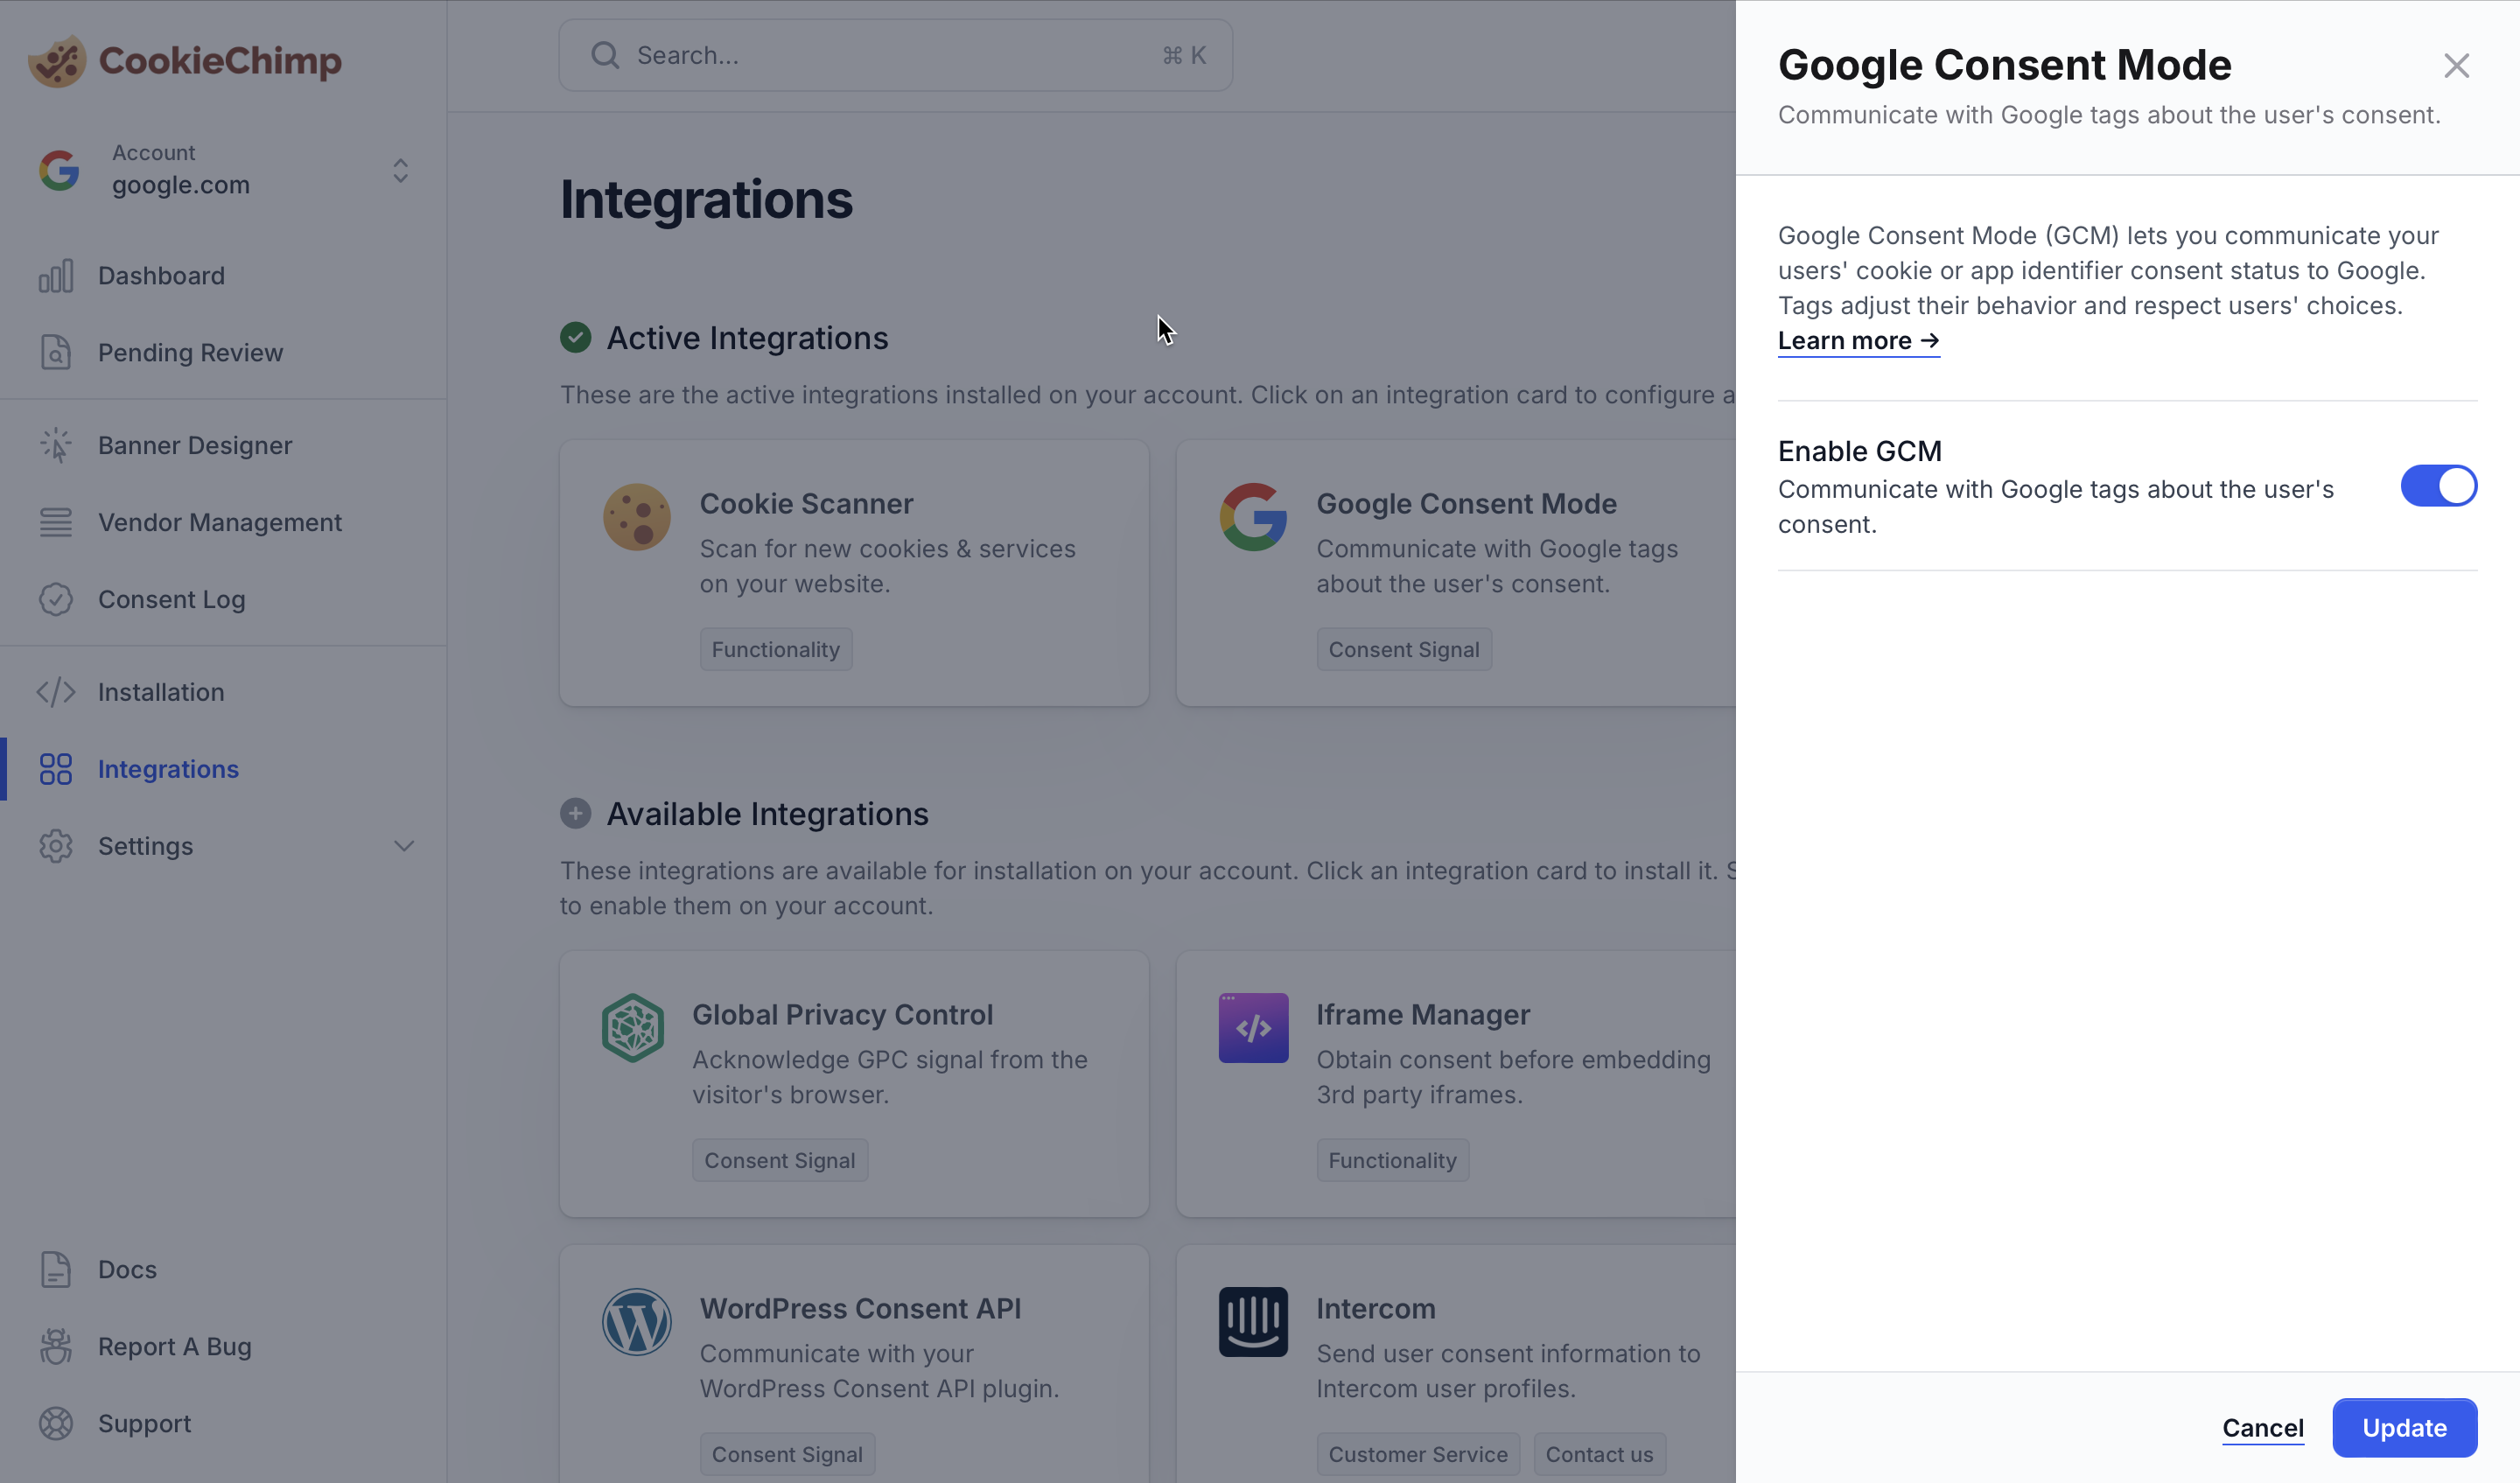
2
Add/Edit Tag
Create or update a tag and add an additional consent check so the tag only fires once the matching vendor has consent.Navigate to “Advanced Settings” > “Consent Settings”. Select “Require additional consent for tag to fire” and enter the name of the category or service that the tag needs to fire on.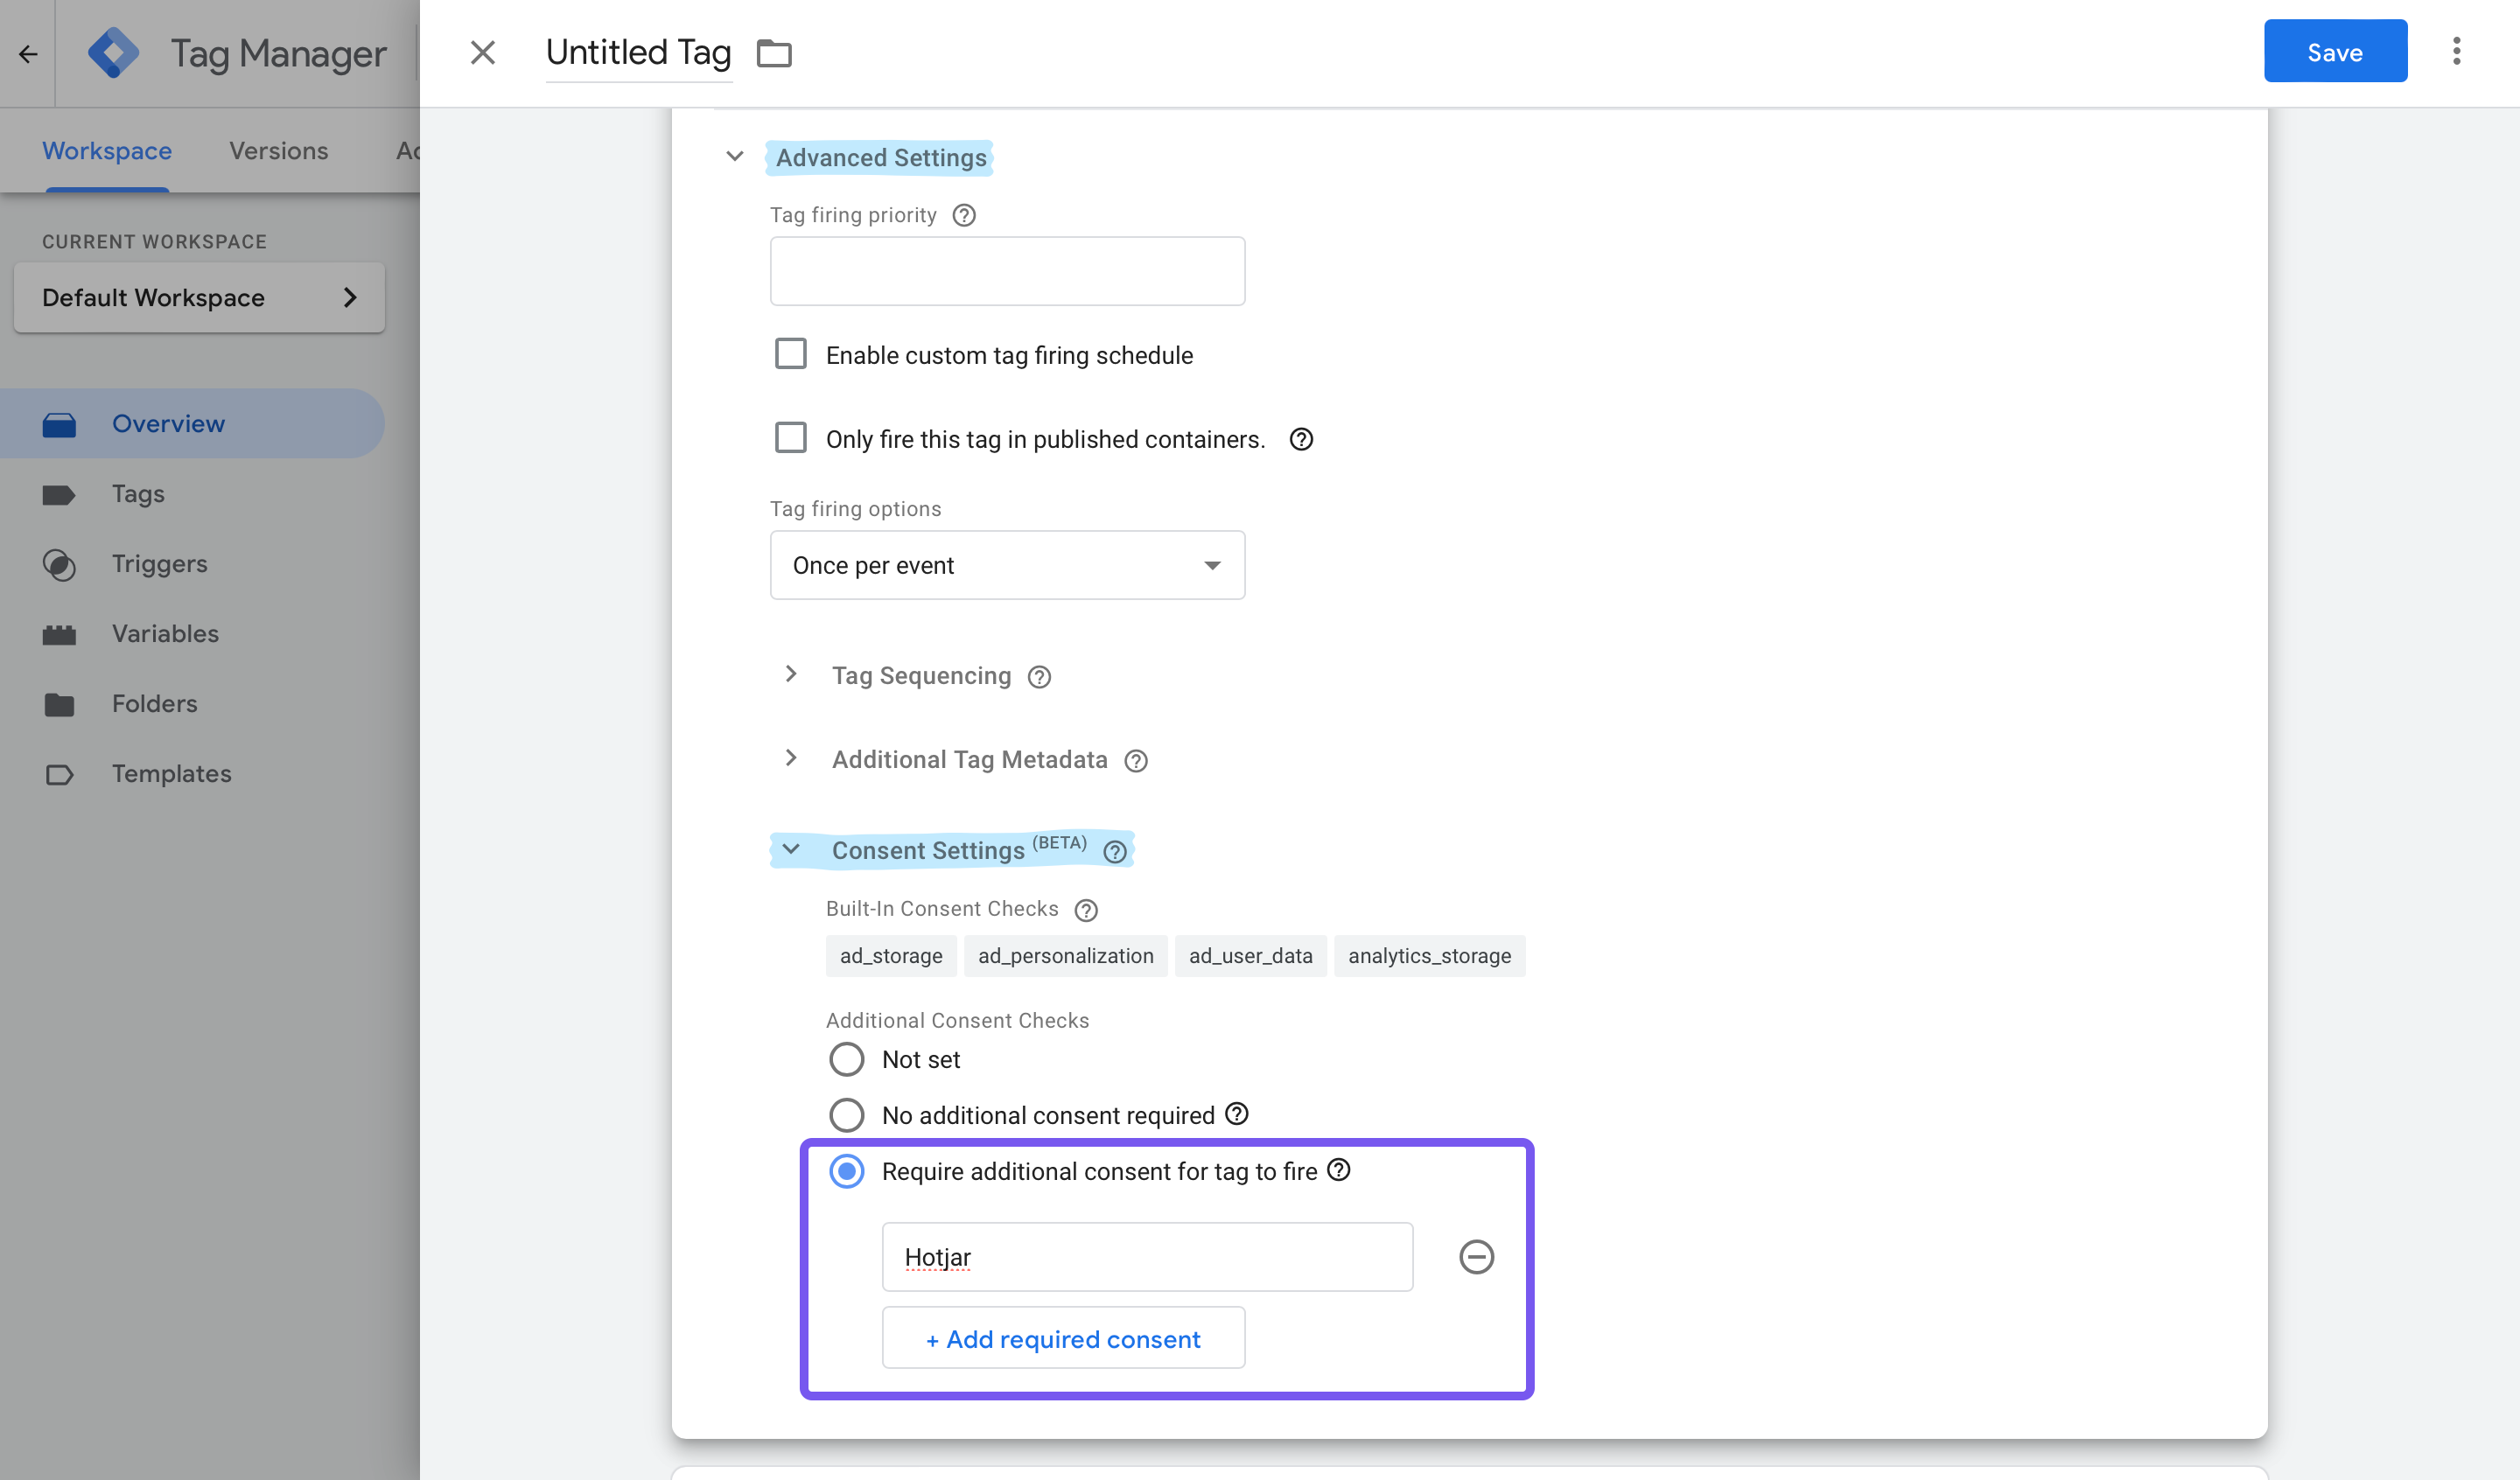
- Recommended
- Alternative
Enter the exact vendor name as it appears in your CookieChimp Vendor Library, e.g
Google Analytics, Hotjar, or Facebook Pixel. CookieChimp sends the consent state of each vendor to Google, so the tag will only fire when that specific vendor has been granted consent in the banner.This is the recommended approach because your visitors can opt in or out of individual vendors inside a category, and a tag should usually only fire when its own vendor is allowed, not just when the broader category has consent.3
Add a custom trigger
This is required to listen for changes in consent state. This event will be triggered by CookieChimp on page load and when the user changes their consent settings.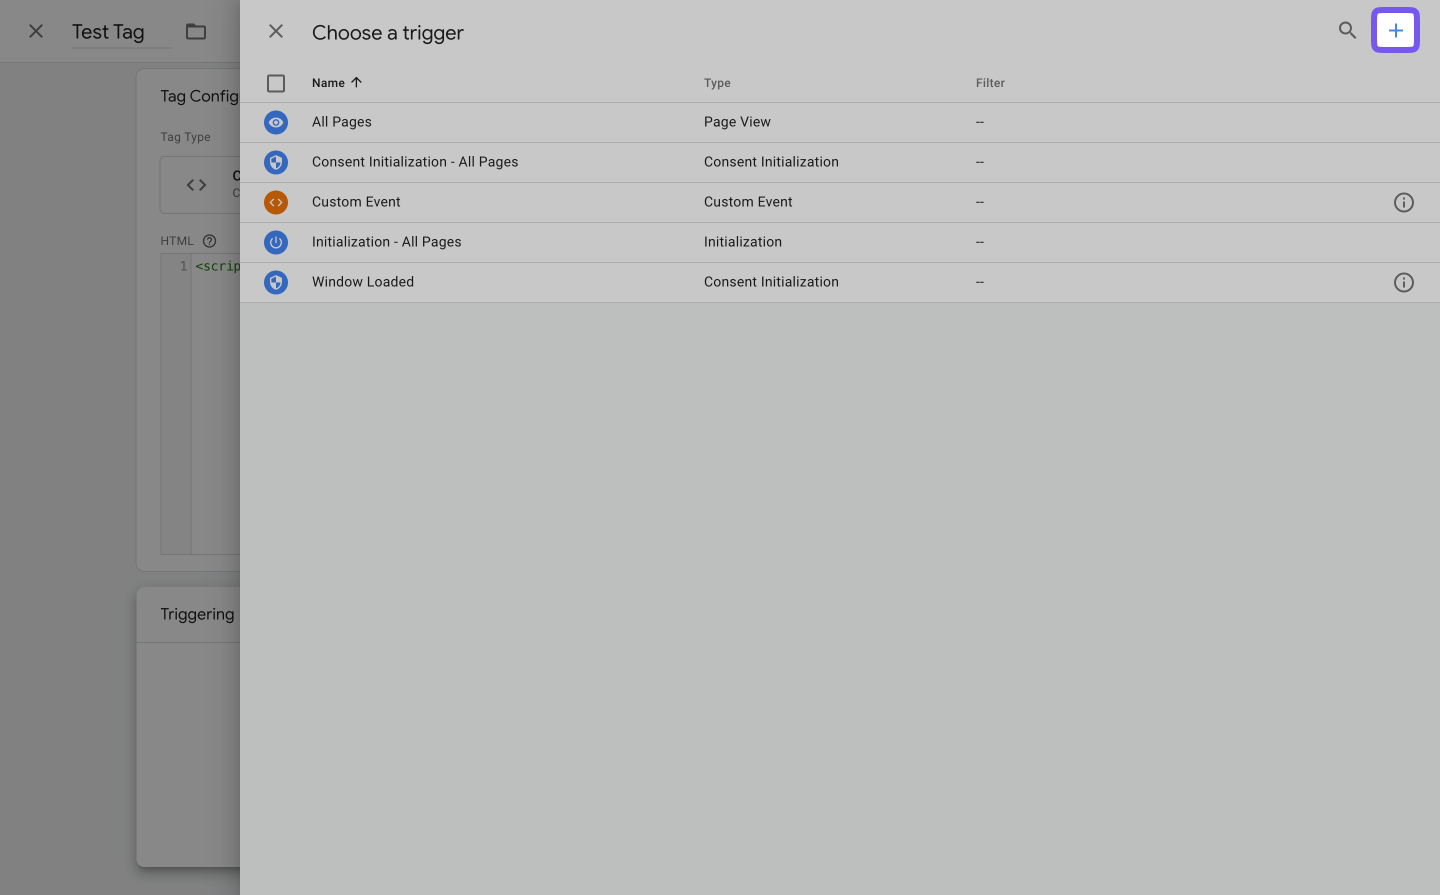
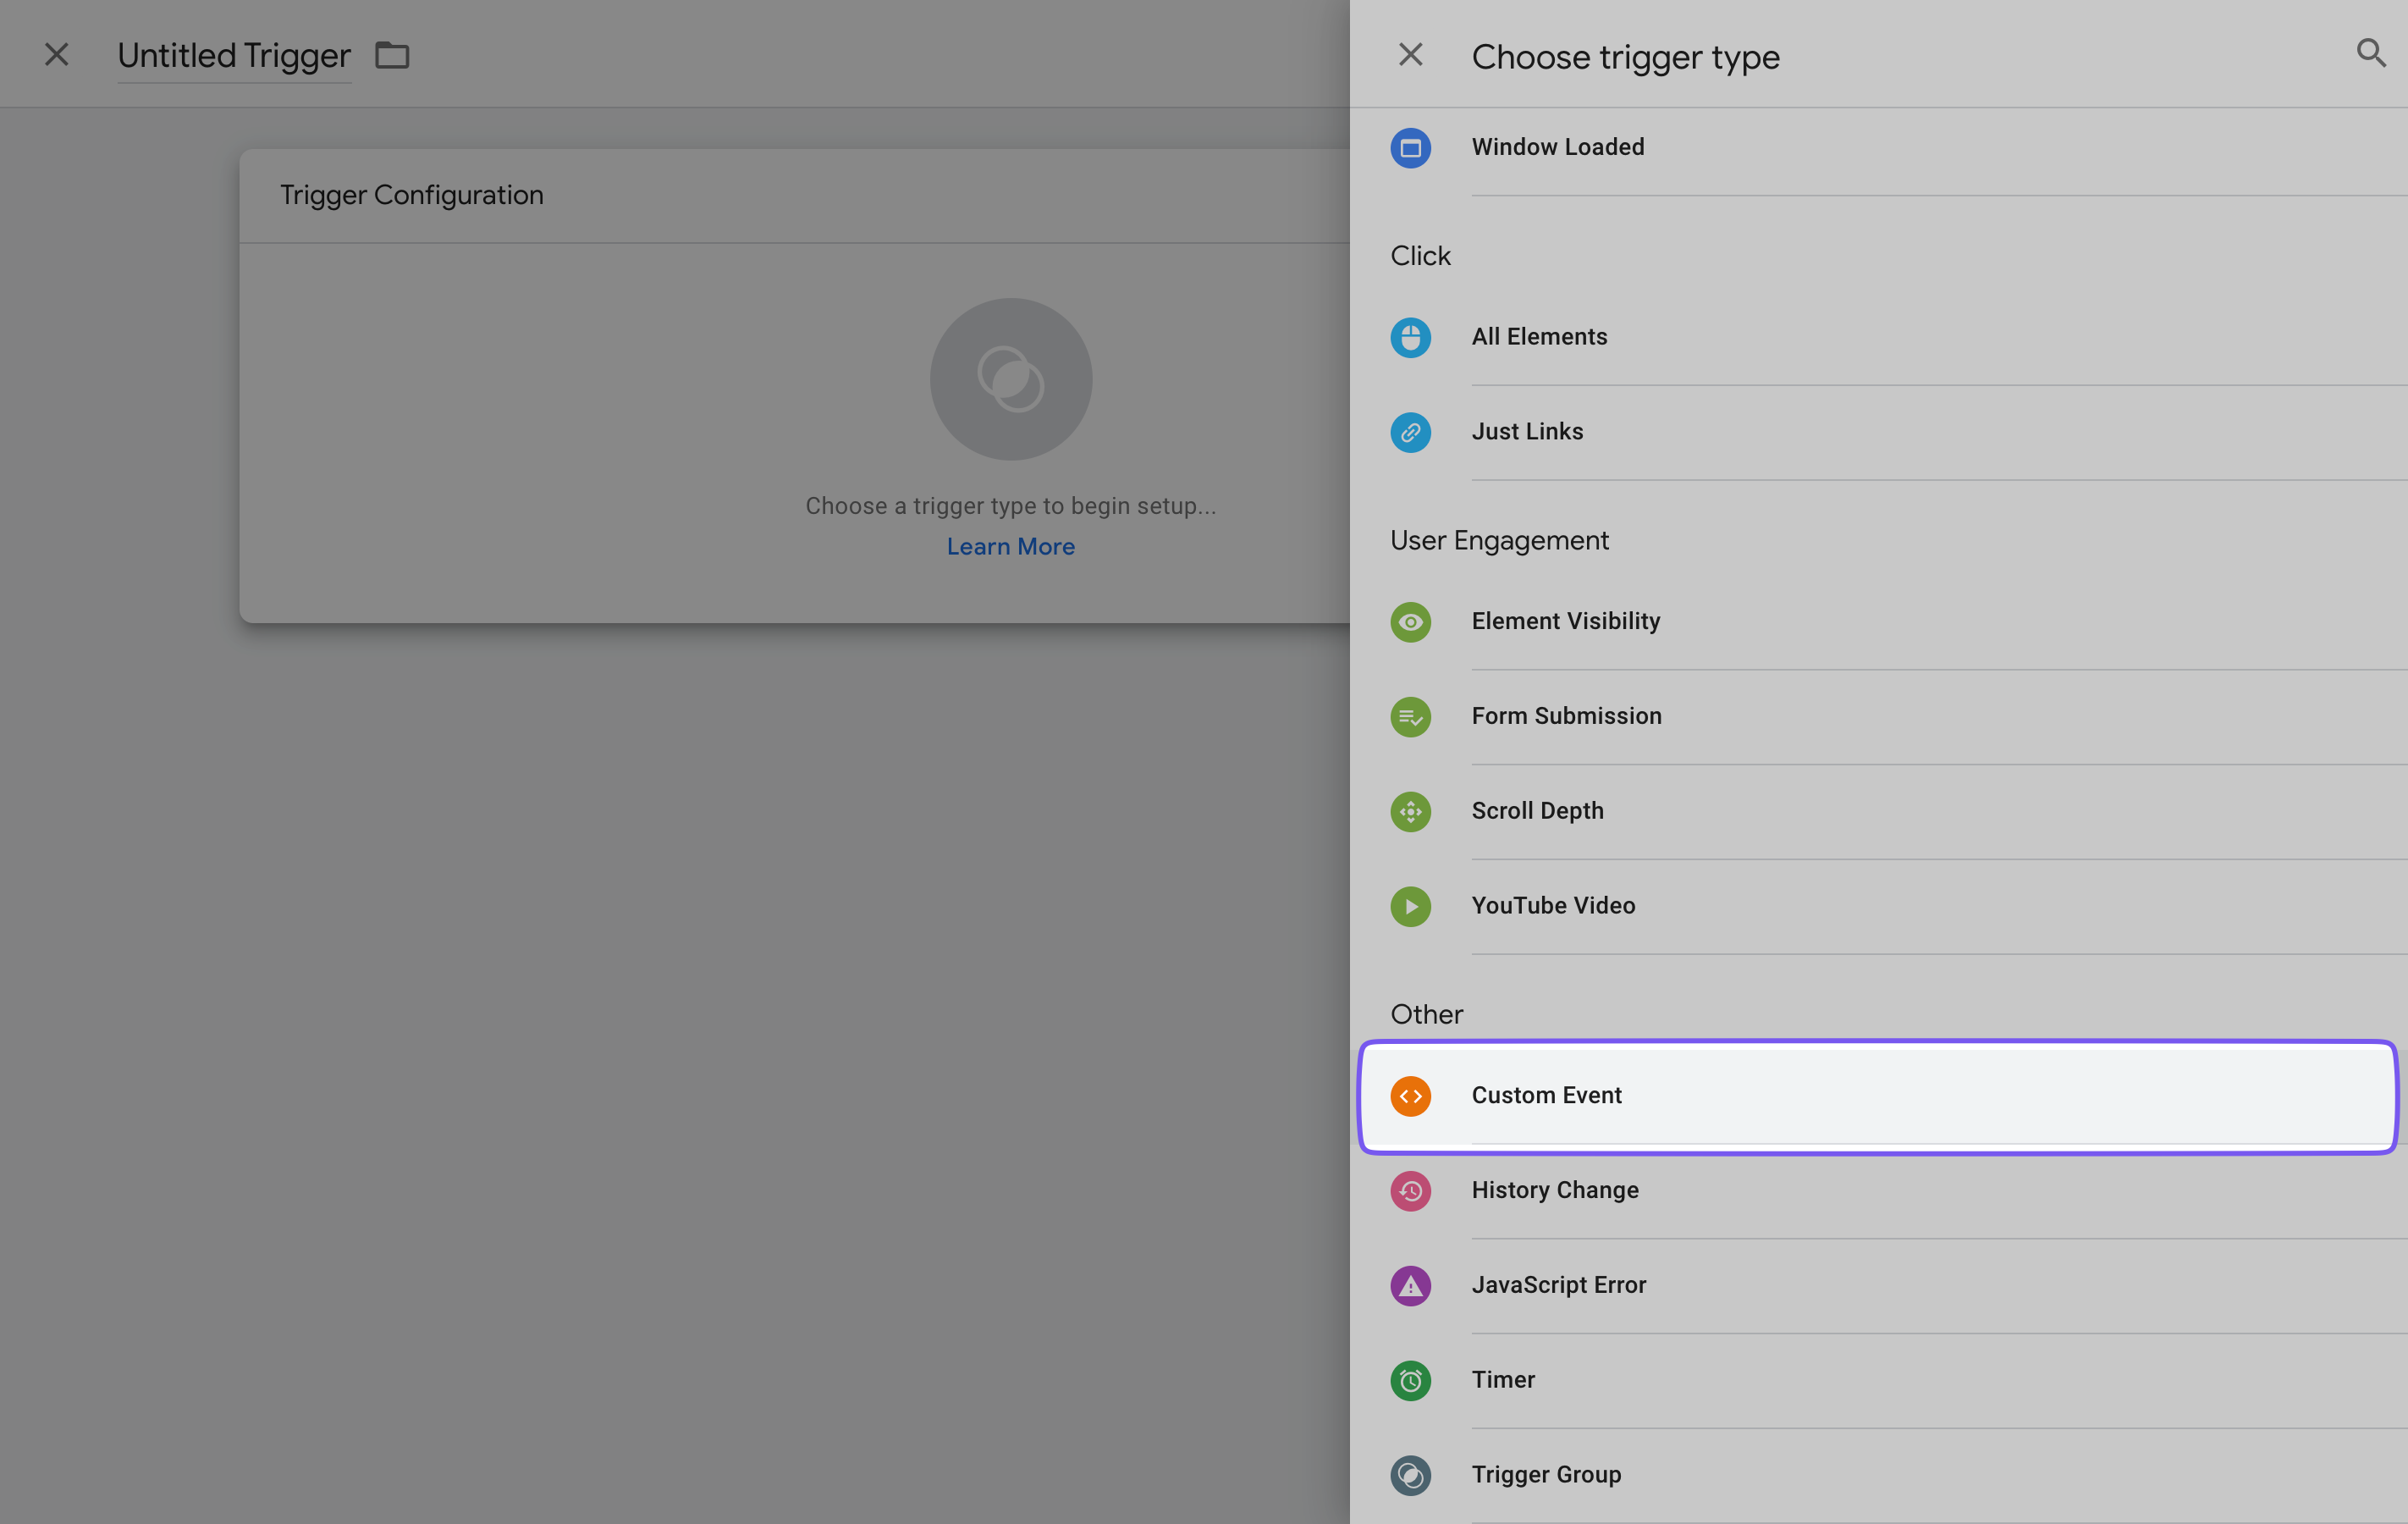
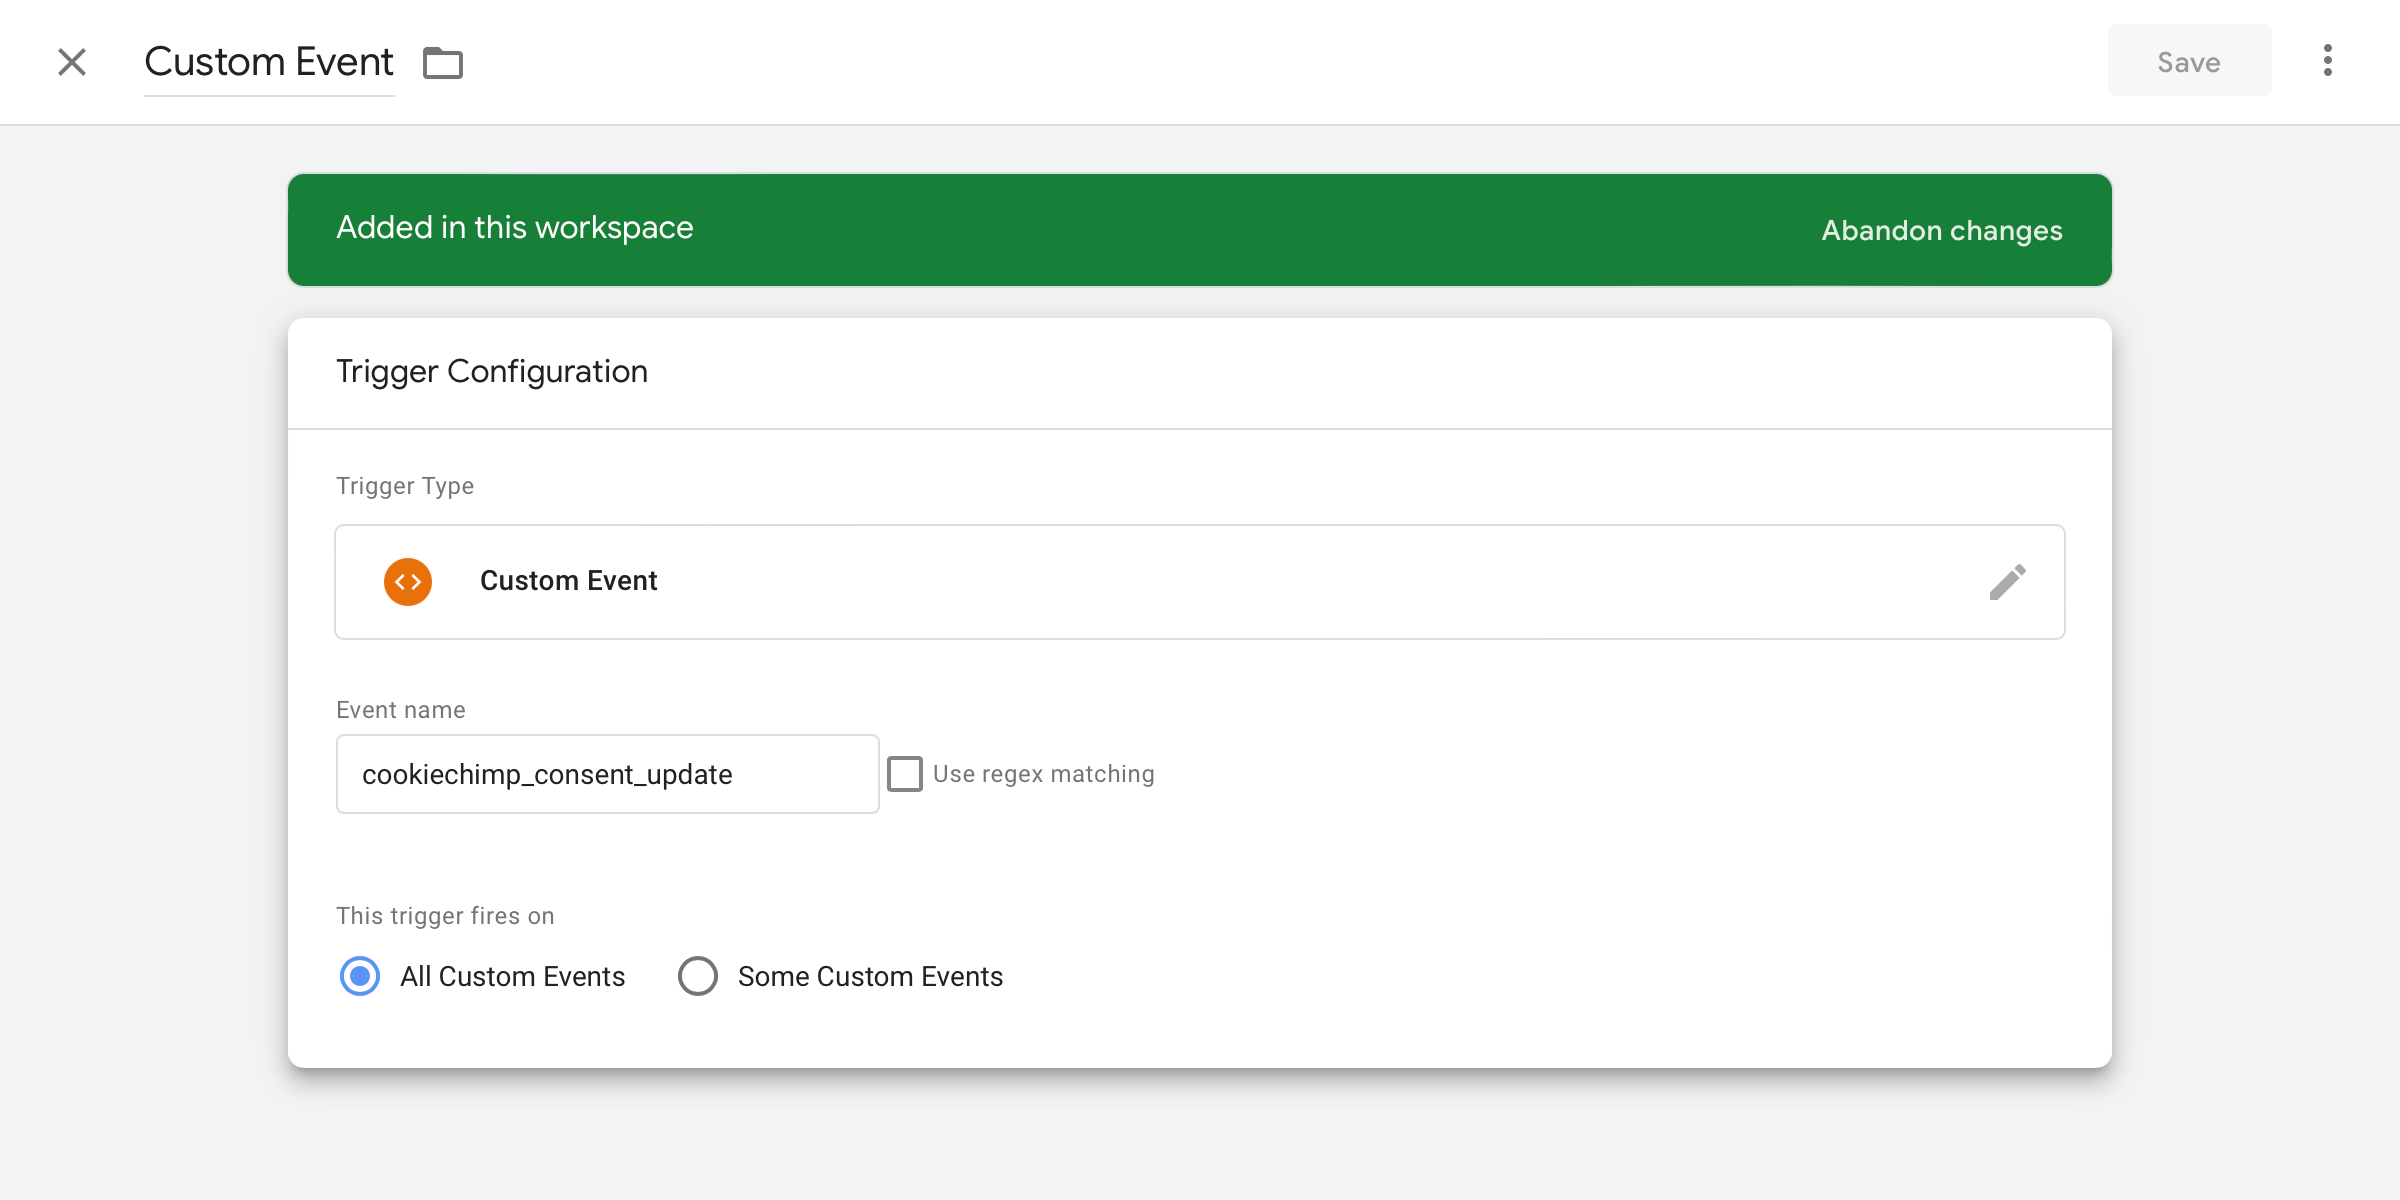
cookiechimp_consent_update and save the tag.How does CookieChimp map to Google consent types?
GTM supports 7 different default consent types. CookieChimp maps these Google consent types into the following categories:
These categories are setup by default. When a user opts-in to a consent category or a Google service in the category is consented to, the linked Google consent type will change from ‘denied’ to ‘granted’ and vice versa.
Apart from the default 7 consent types, we will also send the consent state of your services to Google. For example, when a user consents to a service named “Hotjar”, the consent state for this service is updated as ‘granted’. This is what allows you to use the vendor name directly in a tag’s “Require additional consent for tag to fire” setting (the recommended approach in the Add/Edit Tag step), so the tag only fires when that specific vendor has been granted consent and not just the broader category.